This article was originally published on the BMC Community Client Management blog.
I have been working with a specific BMC client for a very long time, and he has been using BMC Client Management to the fullest as well as others that work alongside him.” He was recently asked to gather data regarding SMB Server and SMB Client configuration on their Windows devices (They manage both Servers and Workstations with BCM). The data can be extracted using PowerShell:
Get-SMBServerConfiguration
Get-SMBClientConfiguration
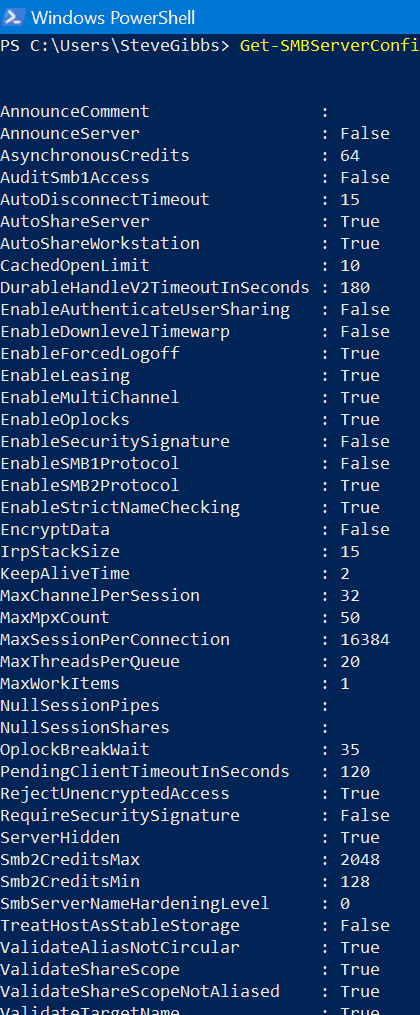
Not all rows of data are needed, so the method to capture to a text file, manipulate that text file and only add the rows of interest to a new text file that combines all the required data into a single file.
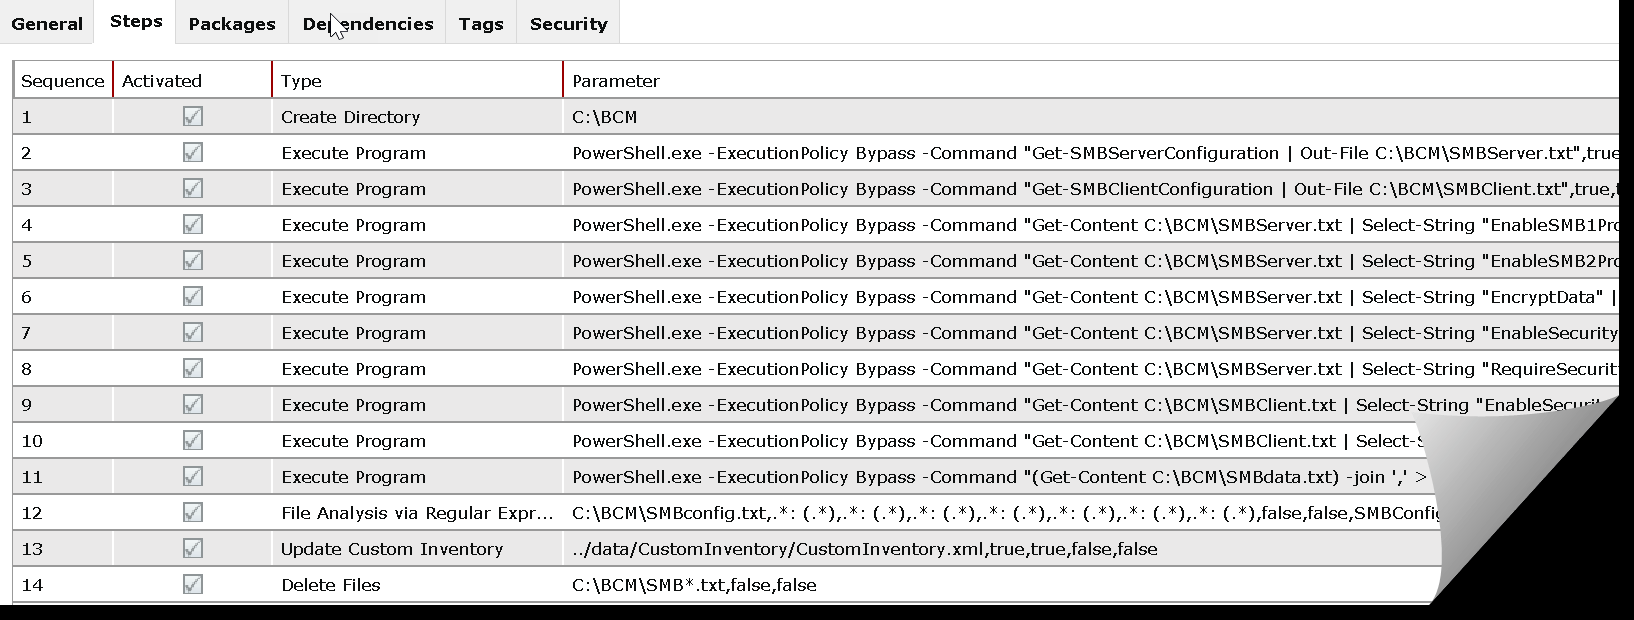
In this EXAMPLE, you will see the actual Op Rule used to create a very concise Custom Inventory entry in BCM.
Below are the actual CMD used in the Op Rule:
| BCM Steps | |
| Create Directory | C:\BCM |
| Execute Program | PowerShell.exe -ExecutionPolicy Bypass -Command "Get-SMBServerConfiguration | Out-File C:\BCM\SMBServer.txt" |
| Execute Program | PowerShell.exe -ExecutionPolicy Bypass -Command "Get-SMBClientConfiguration | Out-File C:\BCM\SMBClient.txt" |
| Execute Program | PowerShell.exe -ExecutionPolicy Bypass -Command "Get-Content C:\BCM\SMBServer.txt | Select-String "EnableSMB1Protocol" | Set-Content C:\BCM\SMBdata.txt" |
| Execute Program | PowerShell.exe -ExecutionPolicy Bypass -Command "Get-Content C:\BCM\SMBServer.txt | Select-String "EnableSMB2Protocol" | Add-Content C:\BCM\SMBdata.txt" |
| Execute Program | PowerShell.exe -ExecutionPolicy Bypass -Command "Get-Content C:\BCM\SMBServer.txt | Select-String "EncryptData" | Add-Content C:\BCM\SMBdata.txt" |
| Execute Program | PowerShell.exe -ExecutionPolicy Bypass -Command "Get-Content C:\BCM\SMBServer.txt | Select-String "EnableSecuritySignature" | Add-Content C:\BCM\SMBdata.txt |
| Execute Program | PowerShell.exe -ExecutionPolicy Bypass -Command "Get-Content C:\BCM\SMBServer.txt | Select-String "RequireSecuritySignature" | Add-Content C:\BCM\SMBdata.txt" |
| Execute Program | PowerShell.exe -ExecutionPolicy Bypass -Command "Get-Content C:\BCM\SMBClient.txt | Select-String "EnableSecuritySignature" | Add-Content C:\BCM\SMBdata.txt" |
| Execute Program | PowerShell.exe -ExecutionPolicy Bypass -Command "Get-Content C:\BCM\SMBClient.txt | Select-String "RequireSecuritySignature" | Add-Content C:\BCM\SMBdata.txt" |
| Execute Program | PowerShell.exe -ExecutionPolicy Bypass -Command "(Get-Content C:\BCM\SMBdata.txt) -join ',' > C:\BCM\SMBconfig.txt" |
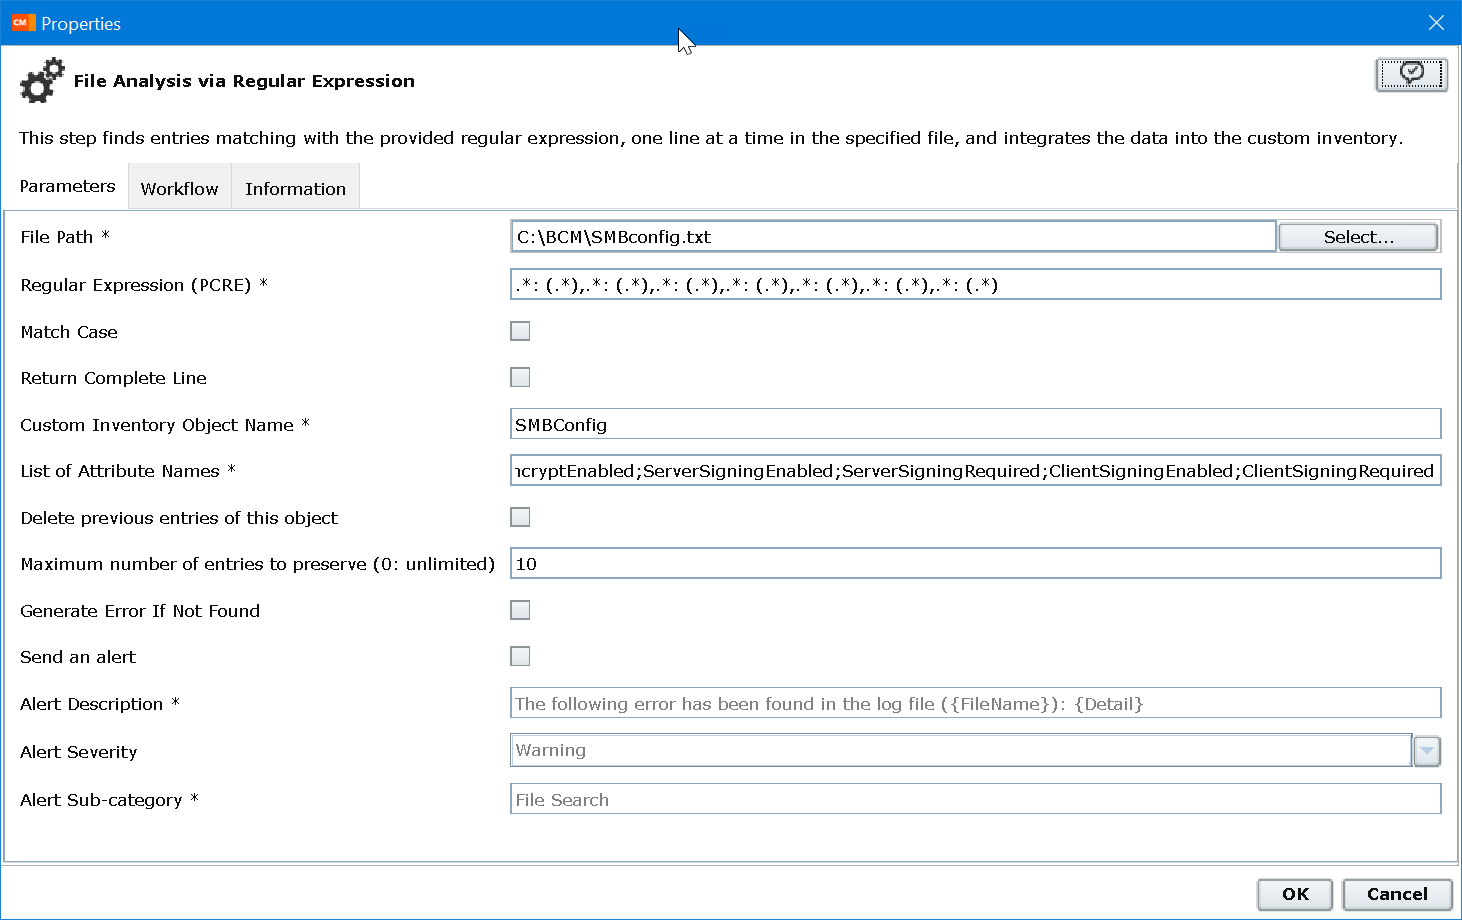
| File Analysis via Regular Expression | RegEx = .*: (.*),.*: (.*),.*: (.*),.*: (.*),.*: (.*),.*: (.*),.*: (.*) - ATTRIBUTE NAMES = SMB1Enabled;SMB2Enabled;EncryptEnabled;ServerSigningEnabled;ServerSigningRequired;ClientSigningEnabled;ClientSigningRequired |
| Update Custom Inventory | Default |
| Delete Files | C:\BCM\SMB*.txt |
 Result:

BCM Module Required: Software Deployment
Tools Used: https://regex101.com (For validation purposes of the Regular Expression)
Actual Step Screen Shot for “File Analysis via Regular Expression:
The client did the heavy lifting finding the PS to Select-String… and add-content to third file. The Join command removes all Carriage Returns (CR) and replaces with commas.
Over to the right side I added a spreadsheet with the full PowerShell commands along with the XML file (Op Rule ready for Import).
I hope many of you will find this article helpful in your admin roles.