Goal
In earlier versions of FootPrints, scheduling preventive maintenance was somewhat complex, with its own section in the application. In FootPrints 12, configuring preventive maintenance schedules has been streamlined.
To schedule maintenance for specific items, you create recurring appointments and link them to specific containers and items. Each time the appointment time is reached, a record is created for that item, using the appointment name as the title of the new record. For example, you might create a recurring appointment to act as a reminder to submit certain data every month and link it to a ticket item in the Support Desk workspace.
For detailed instructions, see the Related topics.
Creating an Appointment on the Calendar
Deleting an Appointment on the Calendar
Prerequisites
- System role access for an agent that includes System Permissions for Calendar.
- A portal for agents that include the calendar console.
- A custom date & time field on the agent web form.
NOTE: The calendar console and permissions are reserved for agent roles only. Placing the calendar console on a customer role portal will result in errors as the assigned user logs in to FootPrints.
Entering the Calendar
Login to FootPrints as an agent. Upon login, the view will be of the assigned portal, which the calendar console should be a part of.
This view includes the viewable Calendar.

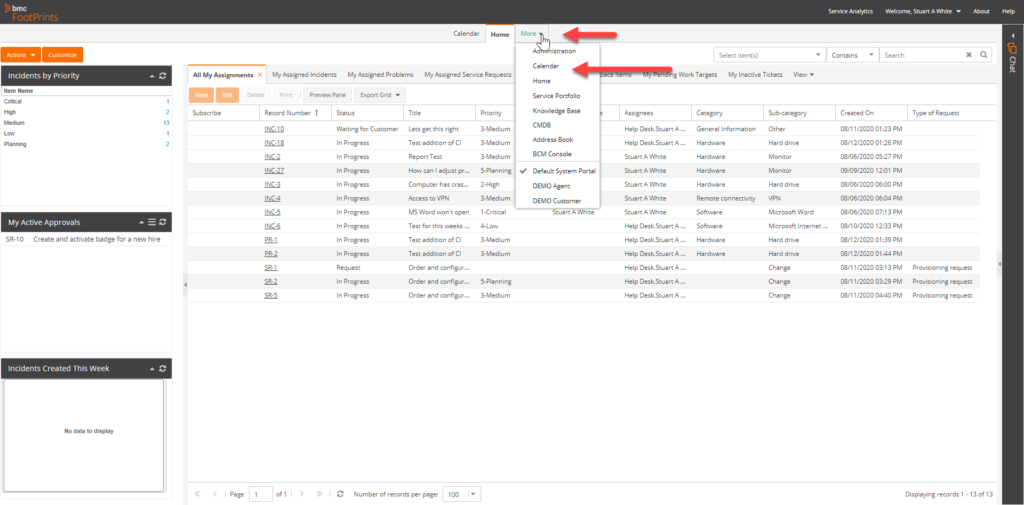
If the view does not contain the calendar, click on More and then select the calendar option.
Creating an appointment from the calendar
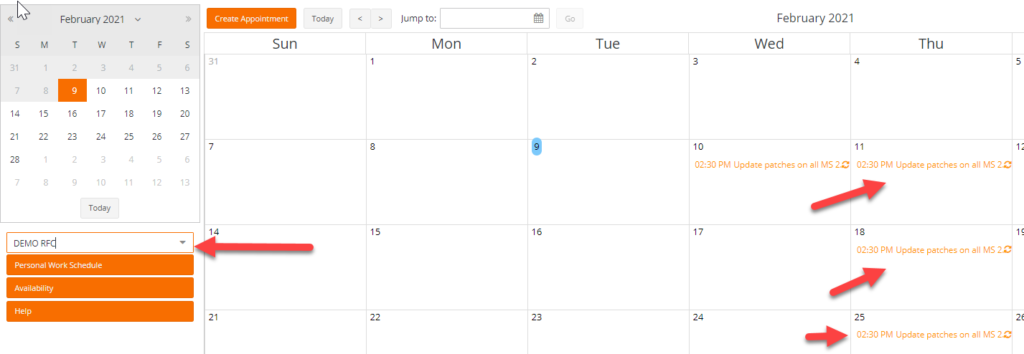
Creating an appointment is the first step in setting up a preventive maintenance task. There are two ways to create an appointment. One is to click the Create Appointment button, and the other is to click on a particular date and time on the calendar. When the Create Appointment button is selected, a random date and time will be shown in the When section. If a date and time are selected in the calendar, then the When section will be populated with that selection.
Example by Create Appointment
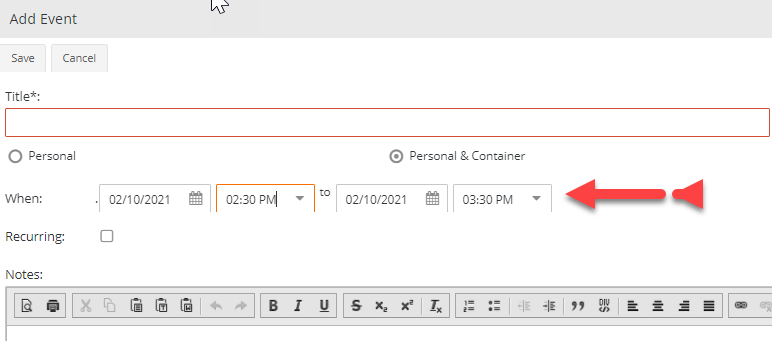
For example by clicking on Wednesday, February 10 at 2:30 pm

At this point, the appointment will need to be created.
- Enter information in Title and Location.
- Change to Personal & Container and then select the workspace container where the preventive maintenance issue will be created.
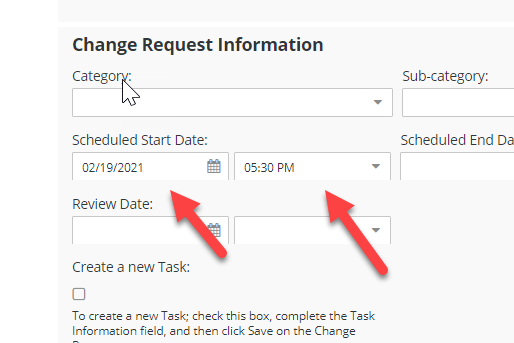
- Enter the beginning and ending date and time in the When section.
- Select the Recurring check box and then fill with the frequency based on the maintenance need.
- Add in Notes any specific instruction.
- Enter the Invitees by clicking on the ellipsis (…) at the far right of the screen. Select users, all teams, or a team with members.
- Select Email Invitees if desired.
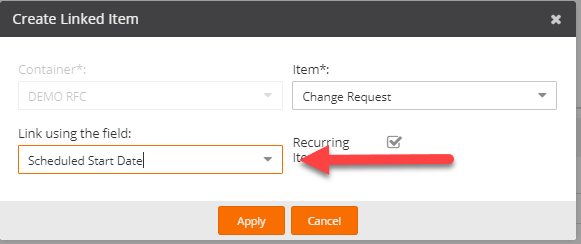
- In the Linked Items section, click on Create Linked Item. The Create Linked Item box will display showing the Container, Item, Link using the field, and Recurring Item. The Container, Item, and Recurring Item are prefilled based on earlier selections for Personal and Calendar, and Recurring. The one field to populate is the Link user field option. This dropdown box will be populated with choices from the workspace container item where field types of date & time exist. In the example, the link is based on the Scheduled Start Date and will be populated with the start date and time in the When section of the calendar appointment.
NOTE: The Title will populate the Subject section of an issue. The Notes will populate the Description section of an issue.
What occurs next is the need to complete an issue that will serve as the template for all subsequent issues created based on the recurring date. All issues created based on this template will contain the same information, with the only change being the start date and time. The start date and time will reflect the date of the recurring event.
While completing the issue, check that the assignee of the issue and the calendar invitees are correct. It is possible to set the issue assignee and calendar invitees with the same or different values.
After the issue fields are populated, Submit the issue. The calendar event will be displayed and will need to be saved. Click on Save.
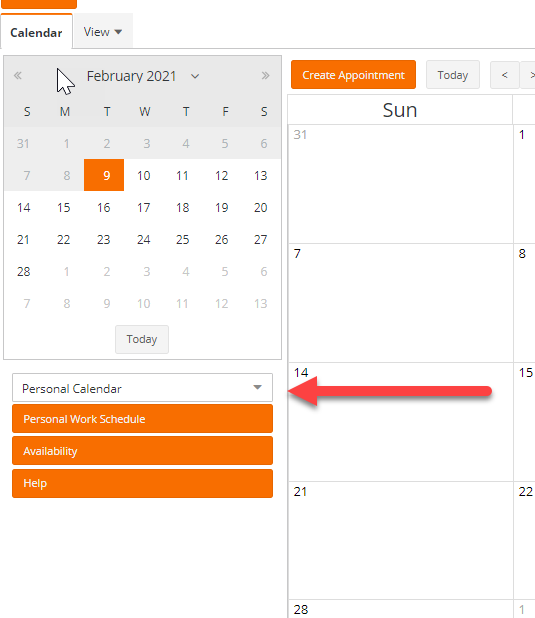
To view the appointment, click on the left-hand dropdown and change from Personal Calendar to the calendar of the workspace or workspace item.
Click on an appointment. The appointment will be in edit mode and may be changed and saved as necessary.
Look at the Linked Items section towards the bottom of the appointment and note the linked issue. The issue Item# may be clicked on to view and possibly edit the issue.
Any changes made to the issue will require saving the issue and calendar appointment. Any change to the calendar appointment will need to be saved. Any change to the issue will be replicated to all recurring issues.
Creating an appointment from an issue
To create a calendar appointment and preventive maintenance issue, there must be a custom date & time field on the agent form. The out-of-the-box Create Date, and Update Date fields will not suffice.
Start by creating a new issue and populating all required and necessary fields. For the custom date and time field, there will be a calendar icon on the field. Click on the icon and select a date for the first preventive maintenance appointment. Next, click the dropdown and then select a start time.

Click on the icon once again and then Create Appointment. The When start date and time will be populated with the previous selection. The remainder of the appointment will be completed with Title, Location, When to date & time, Recurring information, Notes, and Invitees. Save the calendar. Complete and Submit the issue.
The calendar appointment preventive maintenance item can be viewed from the calendar. Click on the Calendar tab and then click on the left-hand dropdown and change from Personal Calendar to the calendar of the workspace or workspace item.
How to see calendar appointments on an issue
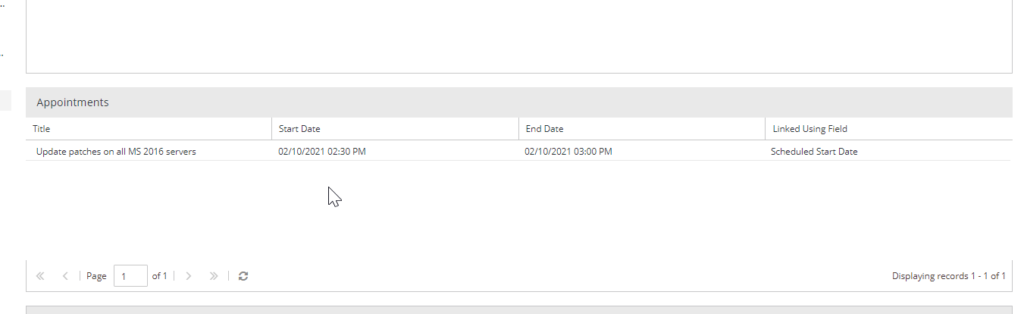
Whether or not there is a custom date & time field to hold the start time of an appointment; there is an option that a FootPrints administrator can add. This option is an out-of-the-box section named Appointments. The Appointments section can easily be added to the agent web form much like the sections for History, Time Spent, and Attachments.
With the Appointments section added to the agent web form; agents may edit an existing calendar appointment, remove the link to an existing appointment, or delete the appointment. An appointment, or calendar entry, may not be created from an issue from the Appointments section. To create an appointment from an issue, there must be a customer date & time field.
Appointments section as seen in View mode:
Appointments section as seen in Edit mode (with Edit, Remove Link, Delete Appointment):

Ending comments
The original issue that is created for preventive maintenance will be serviced as any other issue. Meaning that the issue will be active until an agent resolves or closes the issue. There will be a new issue created, by the FootPrints system, on the date of the next preventive maintenance appointment. This new issue will be system created just after midnight and will be linked to the calendar appointment.